Yubico Login for Windows Configuration Guide
Introduction
Yubico Login for Windows adds the Challenge-Response capability of the YubiKey as a second factor for authenticating to local Windows accounts. See Compatible devices section for determining which key models can be used. Yubico Login for Windows is a full implementation of a Windows Authentication Package and a Credential Provider.
Yubico Login for Windows supports local authentication scenarios; it secures the local login process for local accounts on Windows computers. Use it to configure login with a YubiKey to a local account on an up-to-date system running Windows 8.1, Windows 10, or Windows 11. Yubico Login for Windows is only compatible with machines built on the x86 architecture. It is not compatible with Windows on Arm (ARM32, ARM64) based machines.
Note: Local accounts will not be accessible by Windows Remote Desktop (RDP), but may still be accessible through other remote access software such as VNC or SSH. This other software can bypass the second factor because it does not integrate with the Windows authentication system.
Yubico Login for Windows does not support any of the following:
- Active Directory (AD) managed accounts
- Azure Active Directory (AAD) managed accounts
- Microsoft Accounts (MSA)
It is possible, however, to install and configure Yubico Login for Windows for a local account on a single instance of Windows that also has these other types of accounts. Yubico Login for Windows just has no effect on them. Yubico Login for Windows adds another method of user verification, which exists in parallel with all the other login options enabled for the account. The only user login flow it modifies is the straight username+password flow.
Similarly, Yubico Login for Windows does not interfere with network login via NT LAN Manager (NTLM). Therefore, if you implement file sharing on your local network, authentication to those resources continues to function normally without second factor authentication.
This guide provides instructions for:
- Configuring YubiKeys to work with Yubico Login for Windows
- Best practices for implementing Yubico Login for Windows, such as configuring a primary and a backup YubiKey for each account
- Managing recovery codes
- Guidance on avoiding common problems
- A comprehensive description of how the end-user interacts with the system after YubiKeys have been implemented
Note: Enabling full disk encryption (FDE) using something like BitLocker is highly recommended when using Yubico Login for Windows. If you do not enable FDE, it will be possible to disable the YubiKey requirement by starting Windows in safe mode.
Audience
It is assumed that those who install and configure Yubico Login for Windows are comfortable with managing Windows computers. This user guide is written for both:
- An individual user installing Yubico Login for Windows to configure their own account for login with YubiKeys
- An administrator such as an IT professional installing Yubico Login for Windows to configure login with YubiKeys for a group of end-users.
Refer to the User Experience section at the end of this document for a description of what end-users can expect after their accounts have been configured to require YubiKeys.
Requirements
- For each user (both admins and end-users) at least one (preferably two) of the YubiKeys listed in the Compatible devices section.
- Systems that are running any of the following operating systems, fully updated and for as long as they are supported by Microsoft:
- Windows 8.1
- Windows 10
- Windows 11
Best Practices
- For every account that is to be configured, to ensure that there is no lower-security ‘back door’ access, remove all sign-in options other than username+password. Yubico Login for Windows adds another method of user verification, which exists in parallel with all sign-in options offered natively. The only user login flow it modifies is the username+password method. A single system can be configured such that it has MSA, AD and AAD accounts in addition to local accounts. Yubico Login for Windows only adds the second factor to local accounts.
- Before configuration, consider the end-user experience: if you use an existing Challenge-Response with "require touch" enabled, the end-user must tap the contact twice during registration and at every login. The YubiKey's LED will flash on-and-off steadily at the time the user needs to touch it.
- Have a plan in case end-users lose their YubiKeys, to enable them to regain access to their accounts:
- Configure at minimum a primary and a backup YubiKey for each end-user.
- If a user loses both YubiKeys, a new YubiKey can be added by a local administrator account.
- Without a local administrator account, if both YubiKeys are lost, the only way of recovering is to use a recovery code.
- Configure a recovery code for each account.
- Ensure that the username and password for each account are available and have been tested for validity before using Yubico Login for Windows to configure those accounts.
- In your provisioning plan, be aware that the only way to remove the YubiKey with Yubico Login for Windows is to remove it from the registry manually.
Before Installation
- Before installing the Yubico Login for Windows software, make a note of your Windows username and password for the local account. The person who installs the software must have the Windows username and password for their account. Without these, nothing can be configured and the account is inaccessible. The default behavior of the Windows credential provider is to remember your last login so you do not have to actually type in the username. For this reason, many people may not remember the username. However, once you install the tool and reboot, the new Yubico credential provider is loaded, so that both admins and end-users have to actually type in the username. For these reasons, not only the admin, but also everybody whose account is to be configured via Yubico Login for Windows should check to ensure that they can log in using the Windows username and password for their local account BEFORE the admin installs the tool and configures end-users’ accounts.
- Windows' automatic login is not compatible with Yubico Login for Windows. If a user whose account was set up for automatic login no longer remembers their original password when the Yubico Login for Windows configuration takes effect, the account can no longer be accessed. Address this issue preemptively by:
- Having users set new passwords before disabling automatic login.
- Have all users verify they can access their accounts with username and their new password before you use Yubico Login for Windows to configure their accounts.
- Once Yubico Login for Windows has been configured, there is:
- No Windows Password Hint
- No way to reset passwords
- No Remember Previous User/Login function.
- You can use credentials that were programmed for other purposes (see step 4 in Specify Configuration below).
- You can use the same key on multiple accounts on the same system.
- You can use the same key on accounts on multiple different systems, for example, if you are the admin for a small company, you might want to register your YubiKey on all user accounts to be the backup option for every end-user.
Installation
Note: Administrator permissions are required to install the software.
- Verify your username. Once you have installed Yubico Login for Windows and rebooted, you will need to enter this in addition to your password in order to log in. To do this, open Command Prompt or PowerShell from the Start menu and run
whoami. Take note of the full output, which should be in the formDESKTOP-1JJQRDF\jdoe, where jdoe is the username. - Download the Yubico Login for Windows software from here.
- Run the installer by double-clicking on the download.
- Accept the end-user license agreement.
- In the installation wizard, specify the destination folder location or accept the default location.
- Restart the machine on which the software has been installed. After the restart, the Yubico credential provider presents the login screen that prompts for the YubiKey.
- The Yubico credential provider (Yubico Login) requires that you enter not only the password for your local Windows account, but also the username, which should have been noted in step 1. If necessary, consult Microsoft's instructions for switching to the local account.
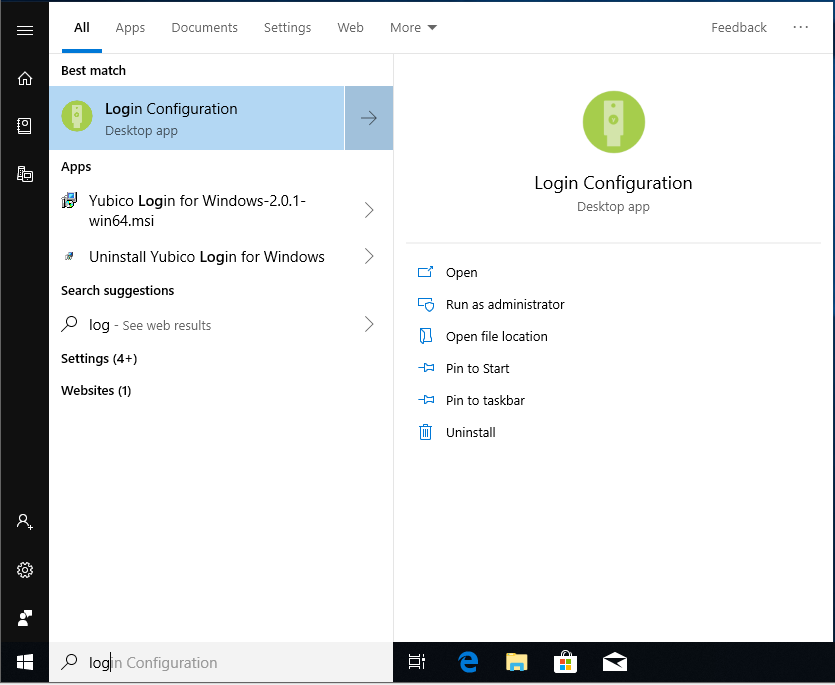
- After you have logged in, search for “Login Configuration” with the green icon as shown below in the following screenshot. (The item actually labelled Yubico Login for Windows is just the installer, not the application.)
Configuration Process
Note: Administrator permissions are required to configure the software.
Only accounts that are supported can be configured for Yubico Login for Windows. If you launch the configuration wizard, and the account you are looking for is not displayed, it is not supported and therefore not available for configuration.
If you use Yubico Login for Windows to configure a YubiKey that has already been used, information may already have been programmed to one or both of the key’s slots. You can use an existing CR credential that was programmed for other purposes such as another Windows account or a password manager. Please note that if the Challenge-Response credential has touch required, you or the end-user will need to tap the touch sensor twice during registration and every login.
Yubico Login for Windows writes the challenge-response secret to slot 2 by default, but you can have it written to slot 1. The application will warn you before you overwrite anything; however, it will not block you from doing so.
Primary and Backup Keys
Use a different YubiKey for each registration. If you are configuring backup keys, each user should have one YubiKey for the primary and a second one for the backup key.
Recovery Code
A recovery code is a last-resort mechanism to authenticate a user if all YubiKeys have been lost. Recovery codes can be assigned to the users you specify; however, the recovery code is only usable if the username and password for the account are also available. The option to generate a recovery code is presented during the configuration process.
Specify Configuration
The provisioning process has defaults and you only need to specify which accounts you want to enable for use with YubiKeys.
1. In the Windows Start menu, select Yubico > Login Configuration.
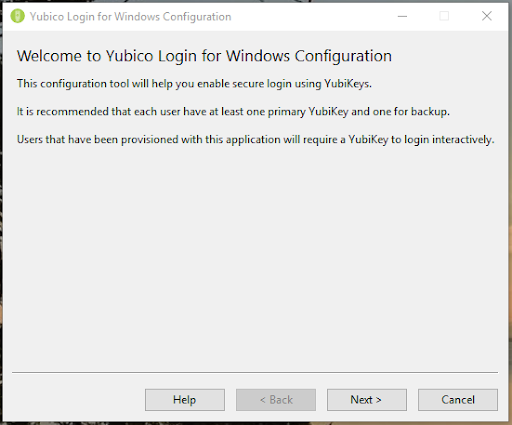
2. The User Account Control dialog appears. If you are running this from a non-Administrator account you will be prompted for local administrator credentials. The Welcome page introduces the Yubico Login Configuration provisioning wizard as shown in the screenshot below:
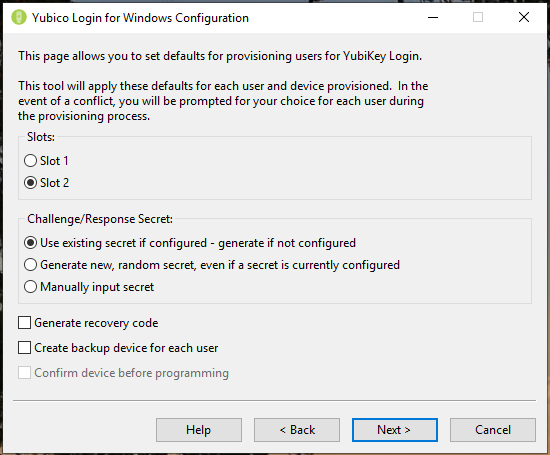
 3. Click Next. The Defaults page of Yubico Windows Login Configuration appears, as shown in the screenshot below.
 4. The configurable items are:
- Slots: Select the slot where the challenge-response secret will be stored. All YubiKeys that have not been customized come pre-loaded with a credential in slot 1, so if you are using Yubico Login for Windows to configure YubiKeys that are already being used for logging into other accounts, do not overwrite slot 1.
- Challenge/Response Secret: This item enables you to specify how the secret will be configured and where it will be stored. The options are:
- Use existing secret if configured - generate if not configured: The key’s existing secret will be used in the specified slot. If the device has no existing secret, the provisioning process will generate a new secret.
- Generate new, random secret, even if a secret is currently configured: A new secret will be generated and programmed to the slot, overwriting any previously configured secret.
- Manually input secret: For advanced users: During the provisioning process, the application will prompt you to input manually an HMAC-SHA1 secret (20 bytes - 40 characters hex-encoded).
4. The configurable items are:
- Slots: Select the slot where the challenge-response secret will be stored. All YubiKeys that have not been customized come pre-loaded with a credential in slot 1, so if you are using Yubico Login for Windows to configure YubiKeys that are already being used for logging into other accounts, do not overwrite slot 1.
- Challenge/Response Secret: This item enables you to specify how the secret will be configured and where it will be stored. The options are:
- Use existing secret if configured - generate if not configured: The key’s existing secret will be used in the specified slot. If the device has no existing secret, the provisioning process will generate a new secret.
- Generate new, random secret, even if a secret is currently configured: A new secret will be generated and programmed to the slot, overwriting any previously configured secret.
- Manually input secret: For advanced users: During the provisioning process, the application will prompt you to input manually an HMAC-SHA1 secret (20 bytes - 40 characters hex-encoded).
- Generate Recovery Code: For each user provisioned, a new recovery code will be generated. This recovery code enables the end-user to log in to the system if they have lost their YubiKey. For more information, refer to the description of the Recovery Code above. Note: If you select to save a recovery code while provisioning a user for a second key, any previous recovery code becomes invalid, and only the new recovery code will work.
- Create Backup Device for Each User: Use this option to have the provisioning process register two keys for each user, a primary YubiKey and a backup YubiKey. If you do not want to provide recovery codes to your users, it is good practice to give each user a backup YubiKey. For more information, refer to the Primary and Backup Keys section above.
Provision Users
The provisioning flow first lists the local accounts available for selection, then displays a page for each user selected in turn, allowing you to register a key or keys for each account.
The provisioning operation can be run as often as necessary. You can also add additional YubiKeys for users already configured for Yubico Login for Windows.
When you insert a YubiKey, Yubico Login for Windows will automatically detect it and proceed to the Device Confirmation page for each user.
- To select the users to provision, from the Defaults page referenced in the Specify Configuration section above, click Next. The Select User Accounts page appears, as shown in the screenshot below. If there are no local user accounts supported by Yubico Login for Windows, the list will be empty.
Note: User accounts that currently have YubiKeys registered and are enabled for Yubico Login for Windows have an asterisk (*) next to the respective usernames. You can add additional YubiKeys for users already configured by selecting the users here.
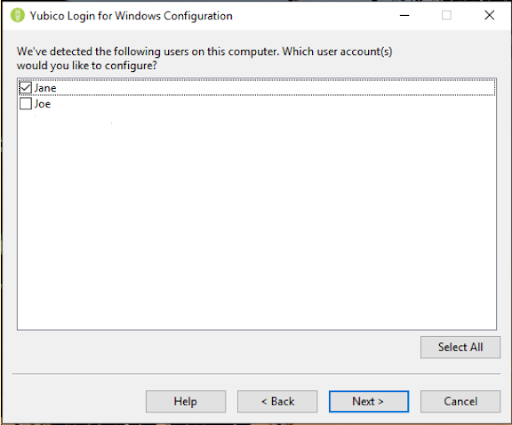
- On the page shown above, select the user accounts to be provisioned during the current run of the Yubico Login for Windows by selecting the checkbox next to the username, and then click Next. The Configuring User page appears as shown below.
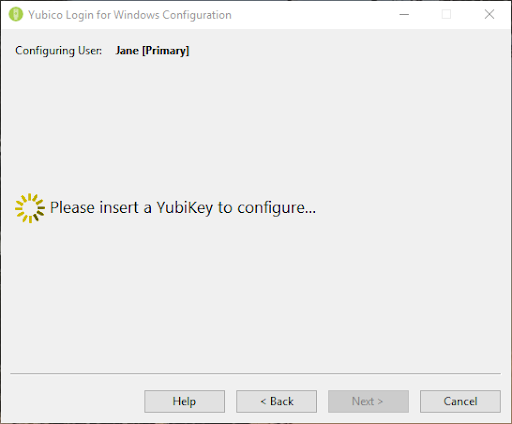
- The username shown in the Configuring User field shown above is the user for whom a YubiKey is currently being configured. As each username is displayed, the process prompts you to insert a YubiKey to register for that user, as shown in the screenshot above.
- The Wait for Device page is shown while an inserted YubiKey is being detected and before it is registered for the user whose username is in the Configuring User field at the top of the page. If you have selected Create Backup Device for Each User in the Defaults page, the Configuring User field will also display which of the YubiKeys is being registered, Primary or Backup.
- If you have configured the provisioning process to use a manually specified secret, the field for the 40 hex-digit secret is displayed. Enter the secret and click Next.
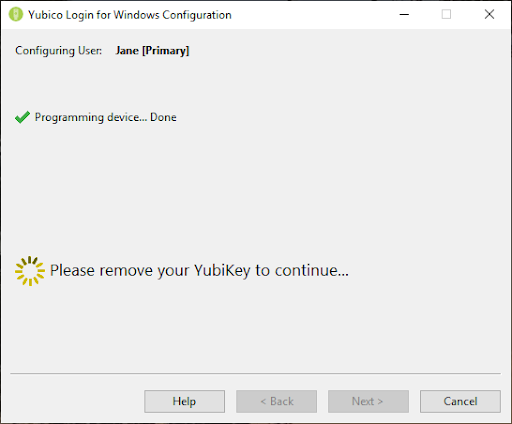
- The Programming Device page displays the progress of programming each YubiKey. The Device Confirmation page shown below displays the details of the YubiKey detected by the provisioning process, including the device serial number (if available) and the configuration status of each One-Time Password (OTP) slot. If there are conflicts between what you have set as defaults and what is possible with the detected YubiKey, a warning symbol is displayed. If everything is good to go, a check mark will be shown. If the status line shows an error icon, the error is described and instructions for fixing it are displayed on the screen.

- Once programming is complete for a user account, that account can no longer be accessed without the corresponding YubiKey. You are prompted to remove the YubiKey just configured, and the provisioning process automatically proceeds to the next user account/YubiKey combination, as shown in the screenshot below.
- After all the YubiKeys for the specified user account have been provisioned:
- If Generate Recovery Code was selected on the Defaults page, the Recovery Code page is displayed.
- For instructions on setting the recovery code, see the next section, Generate Recovery Codes.
- If Generate Recovery Code was not selected, the provisioning process will automatically continue to the next user account.
- The provisioning process moves to Finished after the last user account is done.
Generate Recovery Codes
When setting the parameters for the provisioning flow as described in Specify Configuration above, you can determine whether recovery codes can be created for the YubiKey users. The recovery code is a long string. (To eliminate problems caused by the end-user mistaking the numeral 1 for lowercase letter L and 0 for the letter O, the recovery code is encoded in Base32, which treats alphanumeric characters that look similar as if they actually were the same.)
If this parameter is set, the Recovery Code page is displayed after all the YubiKeys for the specified user account have been configured.
- On the Recovery Code page, generate and set a recovery code for the selected user. Once this has been done, the Copy and Save buttons to the right of the recovery code field become available, as shown in the screenshot below:
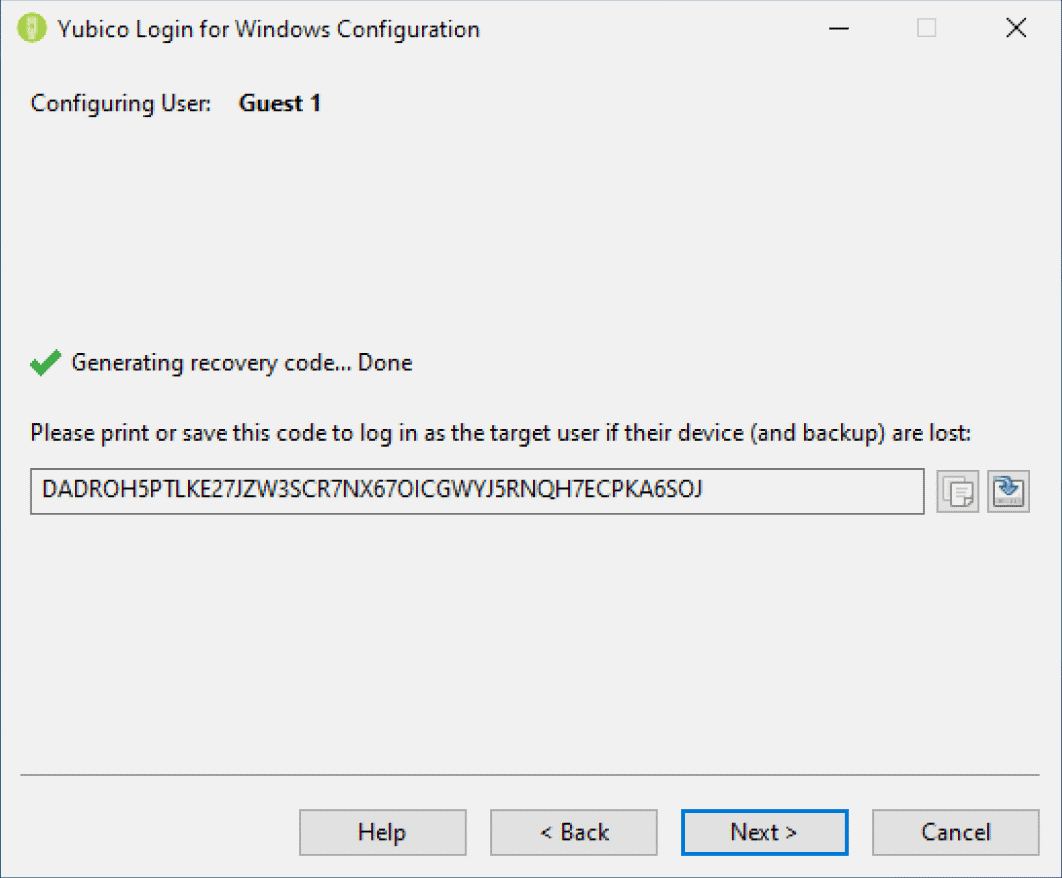
- Copy the recovery code and save it to be shared with the user and/or keep it in case the user loses it.
- Note: Be sure to save the recovery code at this point in the process. Once you proceed to the next screen it is not possible to retrieve the code.
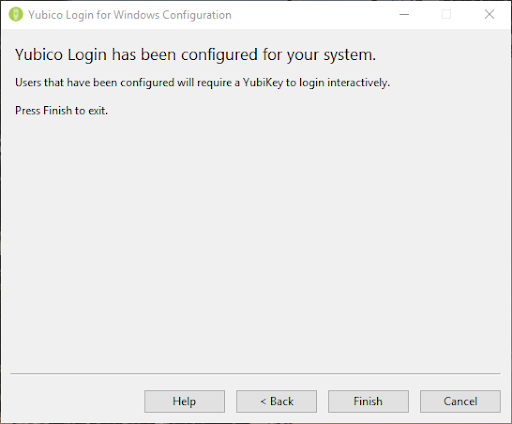
- To move to the next user account from the Select Users page, click Next. When you have configured the last user, the provisioning process displays the Finished page as shown in the screenshot below.
- Give each user their recovery code. End-users should save their recovery code to a safe location accessible when they cannot log in.
User Experience
Yubico As Credential Provider
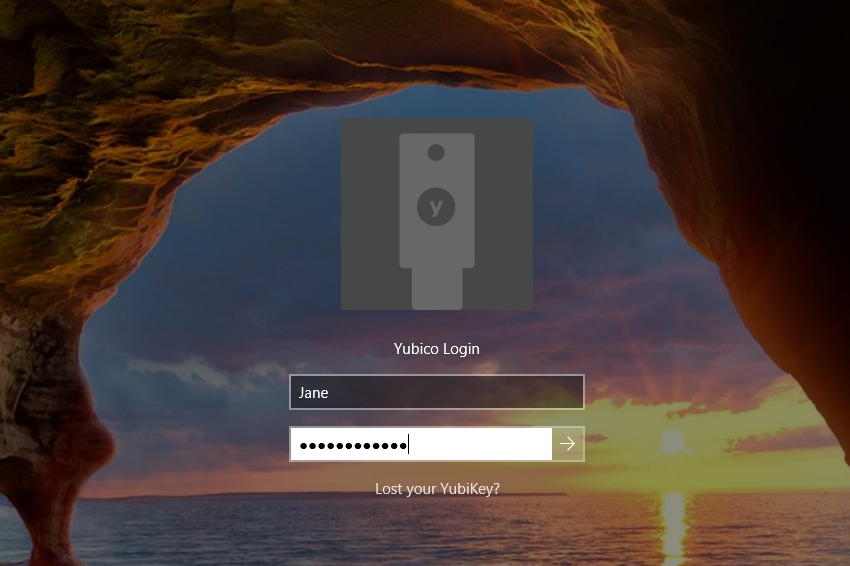
When the local user account has been configured to require a YubiKey, the user is authenticated by the Yubico Credential Provider instead of the default Windows Credential Provider. The user is prompted to insert their YubiKey. Then the Yubico Login screen is presented. The user enters their username and password.
 Note: It is not necessary to press the button on the YubiKey to log in. In some instances, pressing the button actually causes the login to fail.
Attempts to Log In Without YubiKey
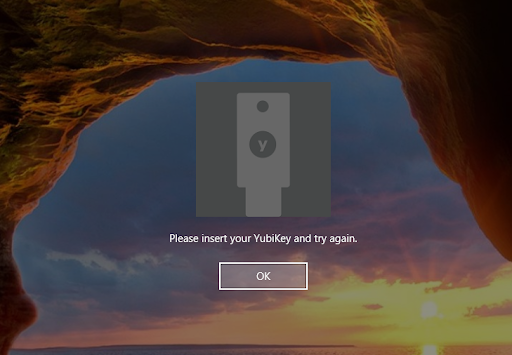
When the end-user logs in, they must insert the correct YubiKey into a USB port on their system. If the end-user enters their username and password without inserting the correct YubiKey, authentication will fail and the user will be presented with an error message such as the one shown in the following screenshot:
Login With Recovery Code
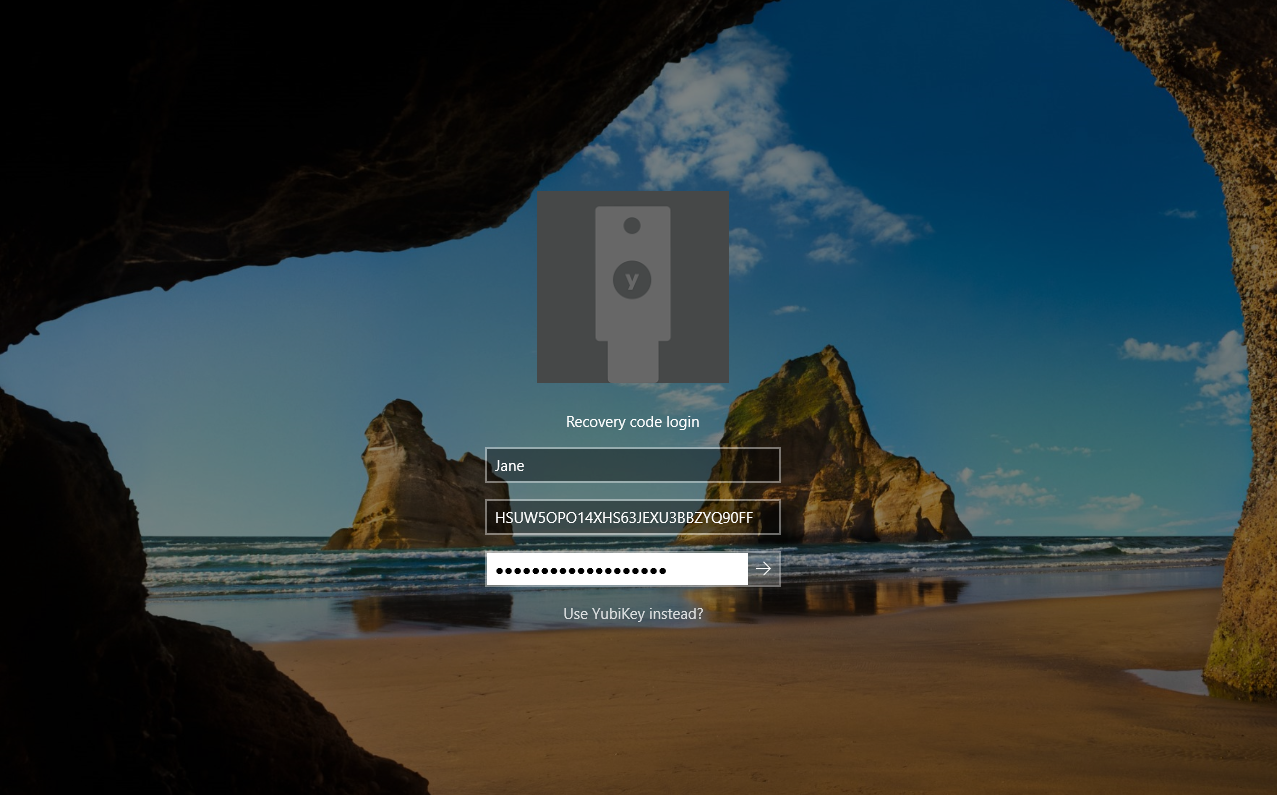
If an end-user’s account is configured for Yubico Login for Windows, and if a recovery code was generated, and a user loses their YubiKey(s), they can use their recovery code to authenticate. The end-user unlocks their computer with their username, recovery code, and password, as shown in the screenshot below:
 Until a new YubiKey is configured, the end-user must enter the recovery code each time they log in.
Changing the Password
Changing the password works the same as with the default Windows Credential Provider.
Additional System Hardening
Yubico Login for Windows secures the local login process for local accounts on Windows computers. It enhances the standard Username+Password method of logging in by adding to the protected account an additional level of security, i.e., requiring the YubiKey registered to the account holder as well as the username and password. Alternative sign-in methods supported by Windows will not be affected. You must therefore restrict additional local and remote login methods for the user accounts you are protecting with Yubico Login for Windows to ensure you have not left open any ‘back doors.’
Troubleshooting
YubiKey not detected
If Yubico Login for Windows does not detect that a YubiKey has been inserted, it is likely due to the key not having OTP mode enabled, or you are not inserting a YubiKey, but instead a Security Key, which is not compatible with this application. Use the YubiKey Manager application to ensure that all the YubiKeys to be provisioned have the OTP interface enabled.
Able to log in using sign-in options other than Yubico Login after provisioning
Windows sign-in options beginning with Windows Hello (e.g. Windows Hello PIN), as well as the Picture Password sign-in option will allow a user to log in to Windows without their YubiKey, even if a requirement has been established with Yubico Login for Windows. It is recommended to disable Windows Hello/Picture Password sign-in options on accounts that are protected by Yubico Login for Windows.
Known Issues
- When Yubico Login for Windows attempts to use an existing secret, it might encounter an error registering the device. To ensure that the OTP slot is configured for HMAC-SHA-1 with a 20-byte secret, use either Yubico Login for Windows or the YubiKey Manager to configure the key. Then retry the operation.
- If you use an existing Challenge-Response secret with "require touch" enabled, the end user will need to tap the contact twice during registration and with every login.
- After installing Yubico Login for Windows and restarting your machine, you have to know your username/password but no YubiKey is required until it has been configured.
- While YubiKeys are being configured, they sometimes show up as serial number 0. This erroneous reading can safely be ignored, as the serial number is correctly read and recorded in the registry.
- If YubiKey Manager or another Yubico configuration software is used to switch the contents of slot 1 and slot 2 after a YubiKey has been configured for Yubico Login for Windows, the YubiKey will not work with Yubico Login for Windows. The remedy is to switch the slots back again using YubiKey Manager or reconfigure the YubiKey for use as second factor authentication for the same user account.
Note: Yubico Login for Windows perceives a reconfigured YubiKey as a new key.